Set up basic navigation
Navigations help your customers browse your site and find important pages or products. You can add menus to your online travel e-commerce platform to organize links to pages, products, campaign products, articles, and other content.
You can set up menus on your header and footer.
Set up header navigation
Header navigation provides a set of menus on top of your website. Our system allows you to add, remove, change, and view your menu freely.
Important Tips:
Keep it simple: Your header navigation bar should be simple and clear, with text that’s easy to read and understand.
While the temptation is to be ‘clever’ with your navigation wording; the purpose of the nav bar is to answer questions and direct people to the key information they need to find.
As the “anchor” of your navigation, the nav bar should be consistent across all pages.
Best practice would showcase ‘Deals’ (packaged offers) and each of the dynamic product offerings (Flights, Accommodation, and Activities) in the top navigation. Subcategories that fall in line with campaigns or product pillars could sit under ‘Deals’. It would also be advised to include an ‘About’ section in the top navigation to help answer questions about your newly launched platform.
While you can add as many custom navigation items as you like, having 5-6 parent items here would be advisable to keep it concise and user-friendly.
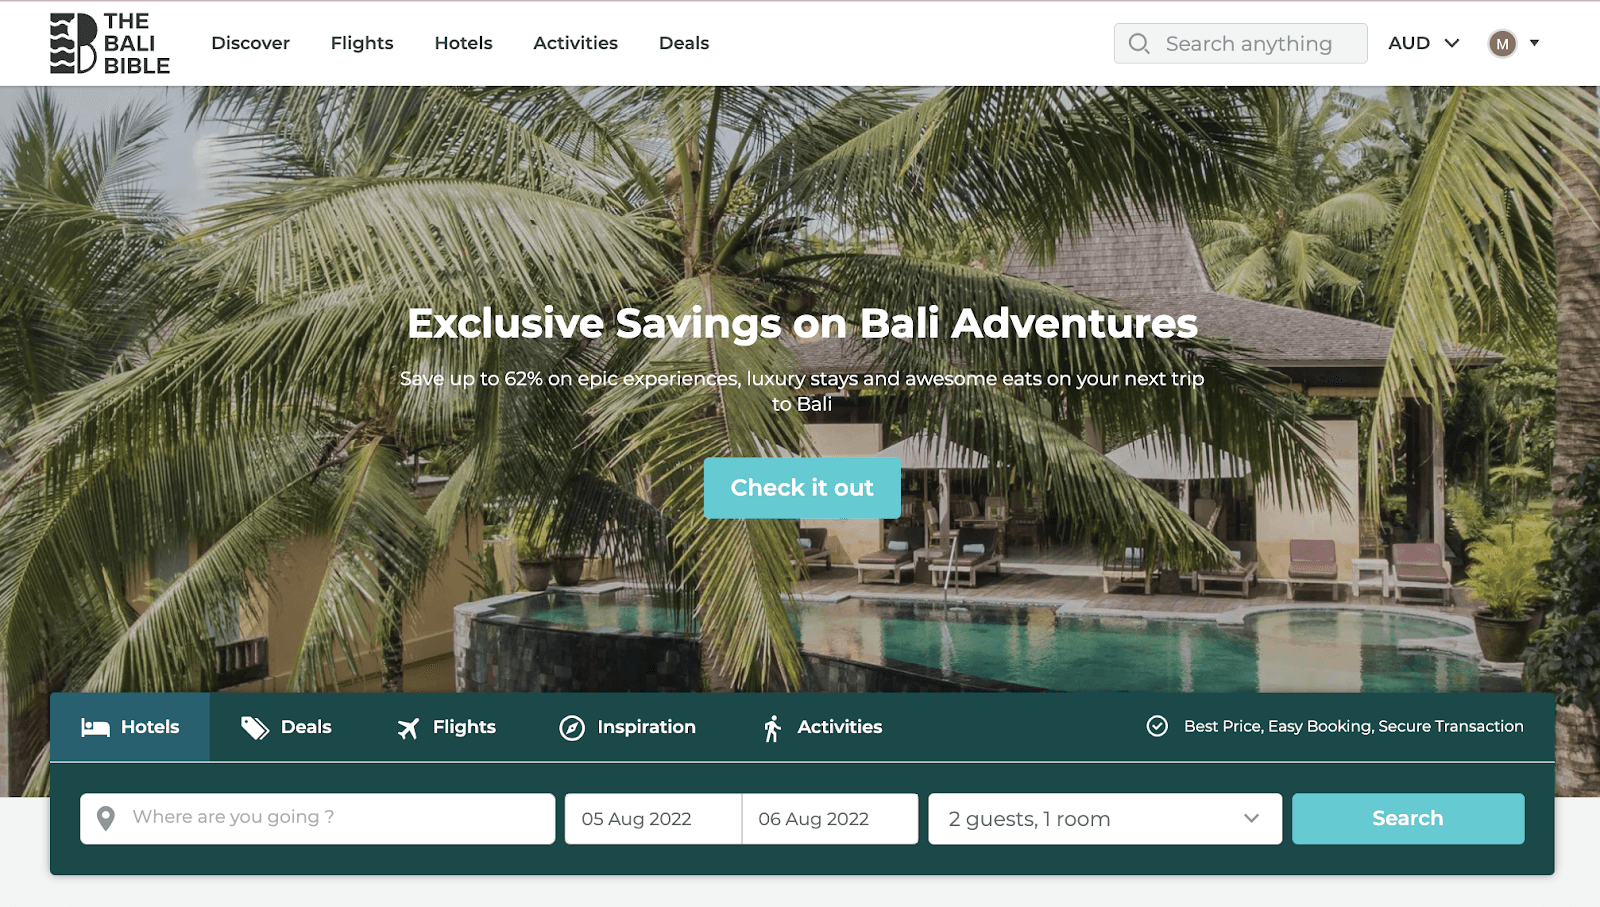
Example of the header navigation bar on The Bali Bible
Steps to arrange header navigation bar items:
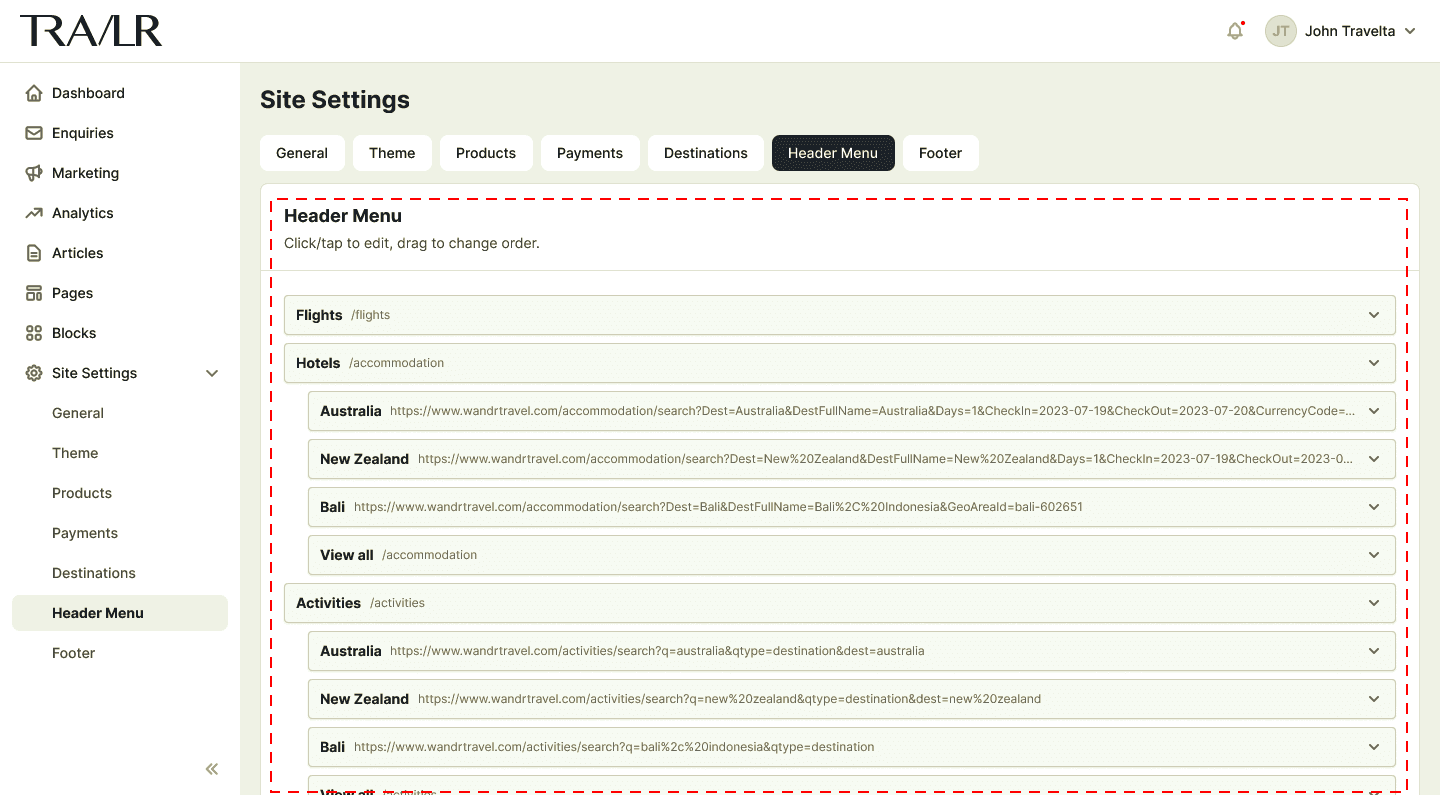
From your TRAVLR Dashboard, go to Site Settings
Click the Header Menu tab
All your menu items are listed under Header Menu. You can add, remove, edit, and order the menu by clicking on the menu item and/or dragging them.
Click Save Changes when done
To add a new menu item, you need to click + Add new menu at the bottom of the page. A menu item builder will appear on top of it. The steps to add and edit a menu item are almost identical. These guides will help you to create and edit a new menu item on the Header.
Steps to add or edit a menu item:
From your TRAVLR Dashboard, go to Site Settings
Click the Header Menu tab
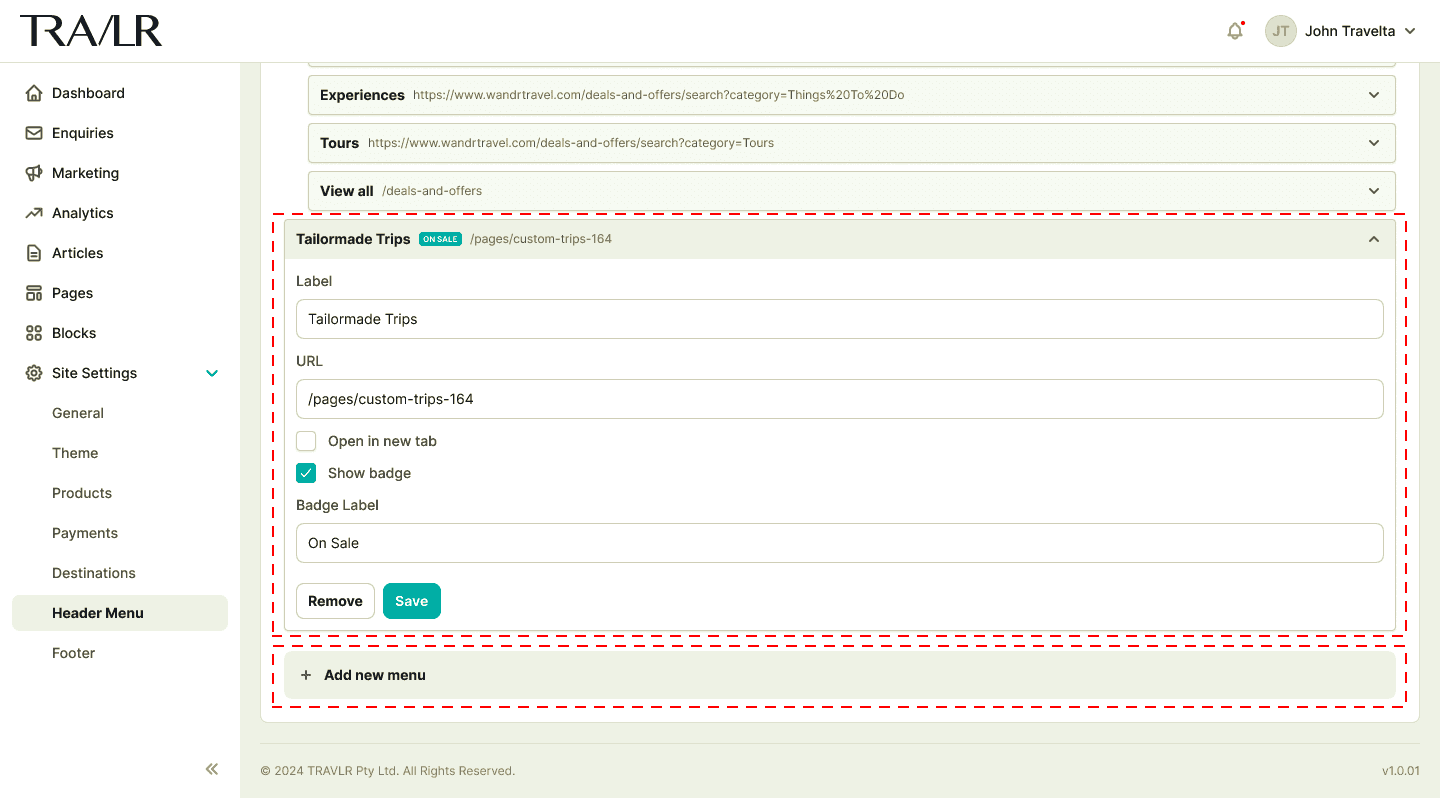
To add a new menu item, click + Add new menu at the bottom of the page. To edit an existing menu item, click the down arrow button on the right side of a menu item from the list.
There are several fields to fill on this menu item builder. Enter the menu item name (that will display on the homepage) under the Label field and the URL under the URL field. These two fields are obligatory.
There are optional fields that you can toggle for more customization. Tick Open in a new tab to open the link on a new tab. Tick the Show badge to add an additional label as a highlight; when you add a Badge, you need to enter a label under Badge Label.
Click Save when done
To publish the menu, click Save Changes
Steps to remove a menu item:
From your TRAVLR Dashboard, go to Site Settings
Click the Header Menu tab
Click the down arrow button on the right side of a menu item from the list.
At the bottom of the editor, click Remove. When a dialogue box appears, click OK
To publish the edited menu, click Save Changes
Set up footer navigation
The footer navigation appears at the bottom of the page. The default footer navigation consists of six areas with different types of content to add in certain kinds of areas. The available areas are:
Two Destinations areas (Footer Menu #1 and Footer Menu #2)
Two Custom URL areas (Footer Menu #3 and Footer Menu #4)
Get Social area (Newsletter Subscription and Social Media links)
Copyright Message area
You can enable and disable each menu area, except for the copyright message area.
Important Tips:
A customer will likely check your footer menu to find information about your platform’s policies and contact information. Other things a customer might be searching for on your footer navigation might vary from – social media links, newsletter subscriptions, help sections/FAQs, and other related content.
We provide several navigation areas on the footer, therefore, we recommend you populate each section with relevant information – but do not overcrowd it.
Steps to set up Copyright Message areas:
From your TRAVLR Dashboard, go to Site Settings
Click Footer tab
In the Footer Setting section, go to the Copyright Message subsection
Enter the copyright message under the Message field and click Save Changes when done

Steps to set up Destinations menu areas:
From your TRAVLR Dashboard, go to Site Settings
Click Footer tab
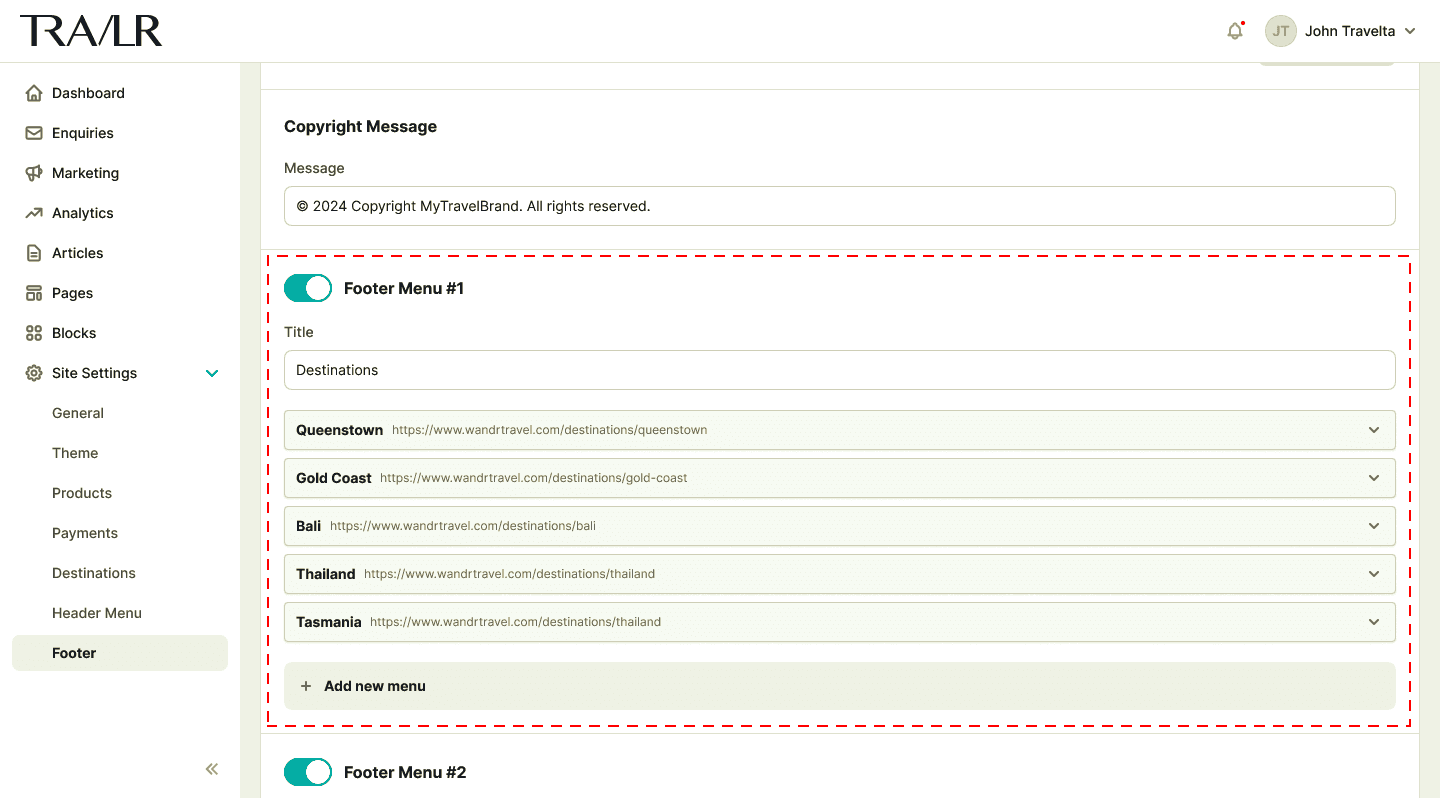
In the Footer Setting section, go to Footer Menu #1 or Footer Menu #2 subsection
Click the toggle next to the section to enable or disable the menu area
Enter the menu header copy under the Title field
To add a new menu item, click + Add new menu. Choose a destination by typing in the Search Destination field. Press Enter or click Add to add the destination to the menu. You can choose as many destinations as you want.
The Footer Menu #1 will appear on the left-most side of the footer menu; Footer Menu #2 will appear on the right side of it.
Click Save Changes when done
Steps to set up Custom URL menu areas:
From your TRAVLR Dashboard, go to Site Settings
Click Footer tab
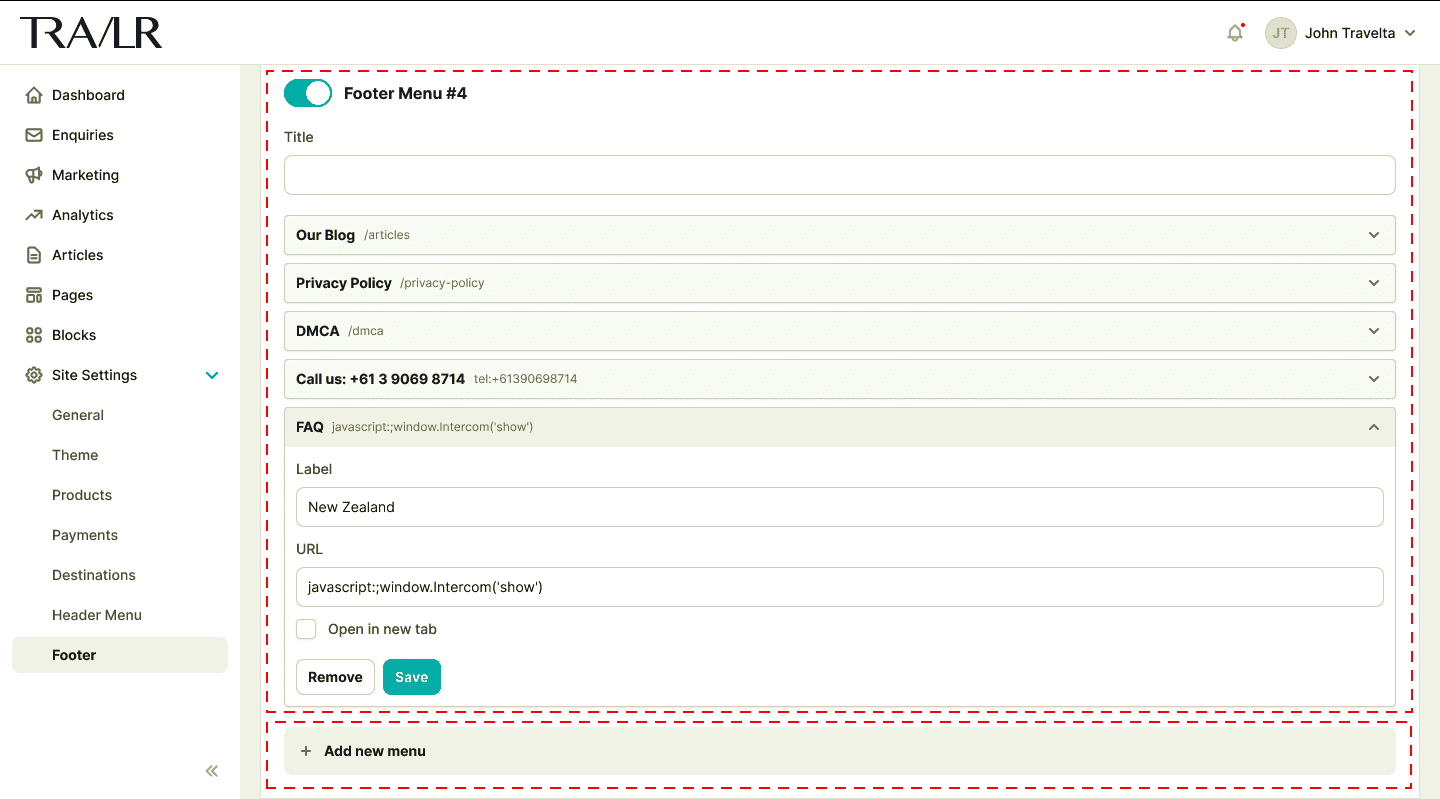
In the Footer Setting section, go to Footer Menu #3 or Footer Menu #4 subsection
Click the toggle next to the section to enable or disable the menu area
Enter the menu header copy under the Title field
To add a new menu item, click + Add new menu. Enter the menu title under the Label field and URL or script under the URL field; then, click Save.
Footer Menu #3 will appear on the right side of Footer Menu #2 of the footer menu; Footer Menu #4 will appear on the right side of Footer Menu #3.
Click Save Changes when done
From your TRAVLR Dashboard, go to Site Settings
Click Footer tab
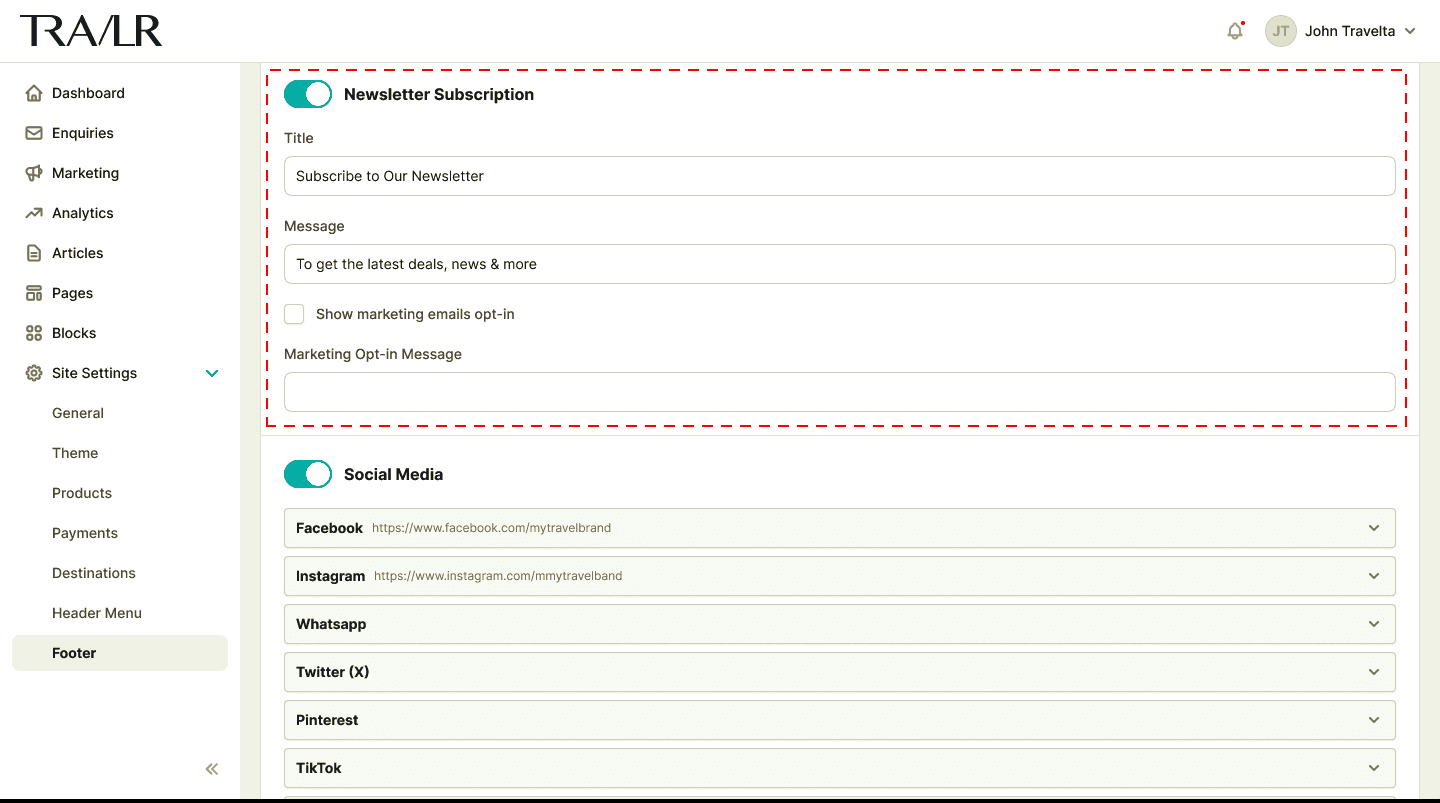
There are two subsections under Get Social – Newsletter Subscription and Social Media. You can enable or disable these menus by clicking the toggle.
To edit the newsletter subscription area, go to the Newsletter Subscription subsection. Enter the menu title under Title and the message under Message. Tick the Show marketing emails opt-in to add an opt-in message which you can edit under the Marketing Opt-in Message field. Click Save when done.
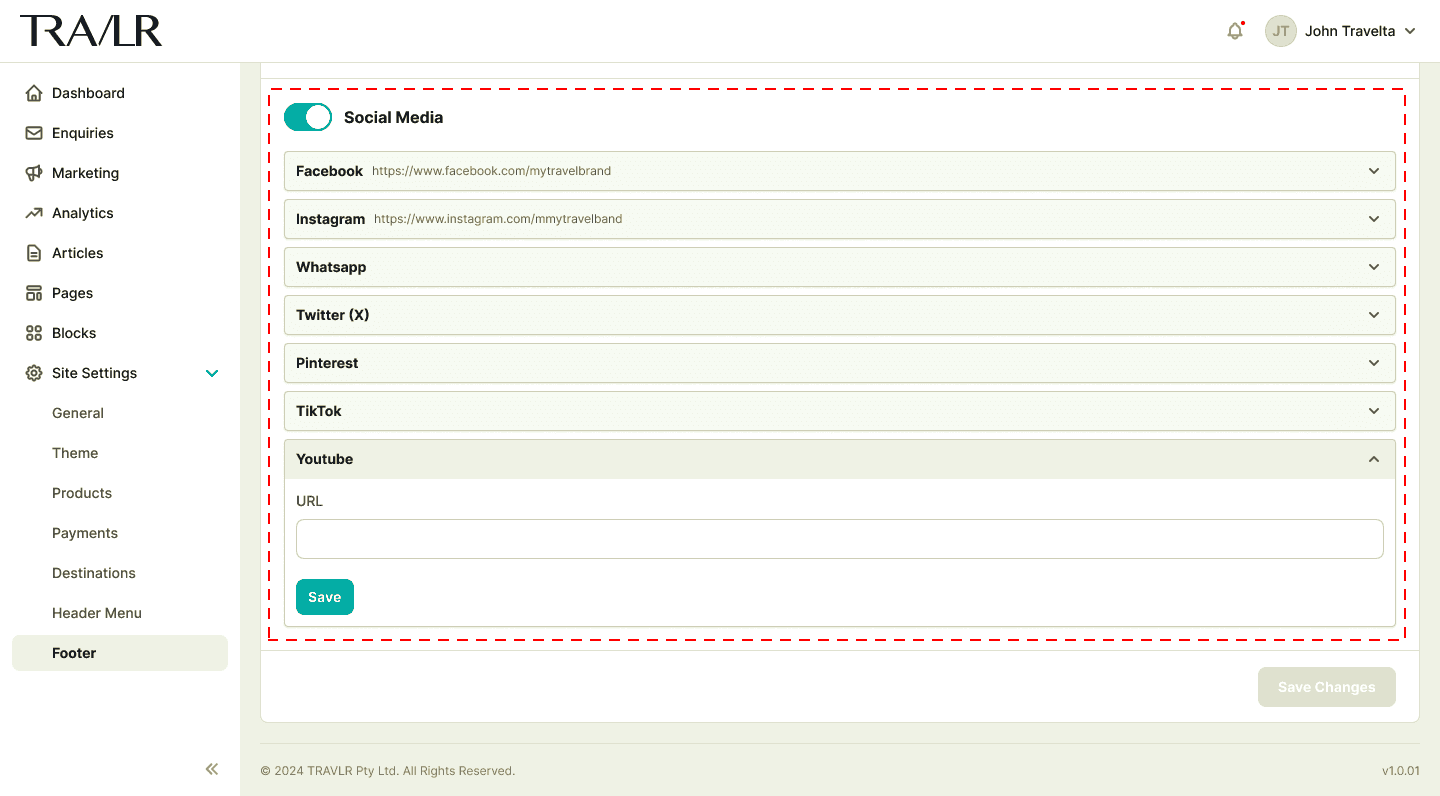
To edit Social Media links, go to the Social Media subsection. The available social media integrations are Facebook, Instagram, WhatsApp, Twitter (X), Pinterest, TikTok, and YouTube.
Click the down arrow on the right side of the Social Media menu item. Enter your social media URL under the URL field. Click Save
Click Save Changes when done