Set up your platform’s identity
Some of these features are coming soon.
To set up your platform, you need to go to the Site Settings (at the bottom of the side menu) from the dashboard.
In the Site Settings, you need to enter your brand information, meta elements (how your platforms will be displayed on search engines), and third-party analytics integrations (including Google Analytics, Meta Pixel, TikTok pixel, etc). You also need to upload your platform’s identity (including logos and favicon).
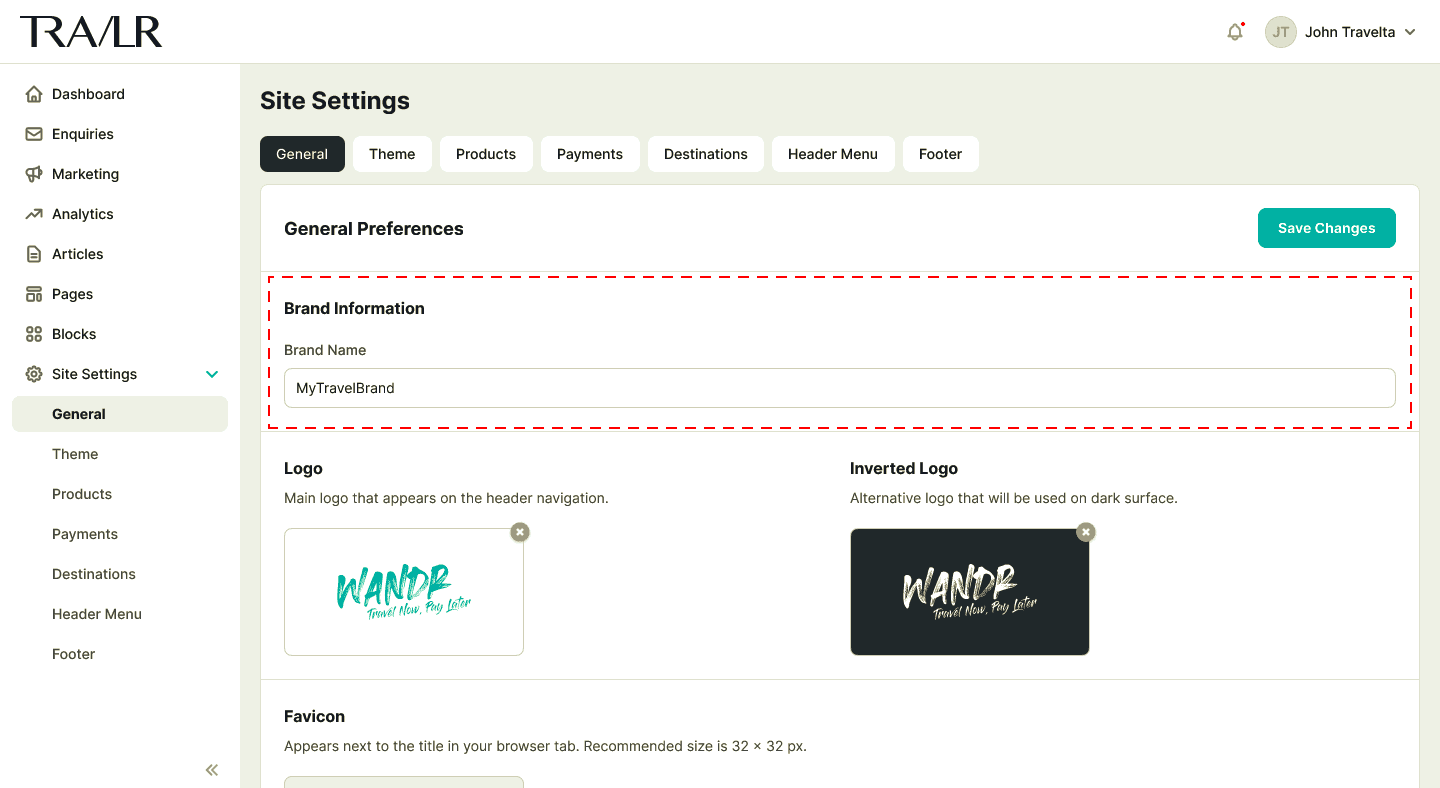
Set your platform’s name
Your platform’s name is your brand’s name. This will be displayed on your site and your bills.
Steps:
From your TRAVLR Dashboard, go to Site Settings
Click General tab
In the General Preferences section, go to the Brand Information subsection
Enter your Platform’s name (Brand Name) and click Save Changes
Set up your logos
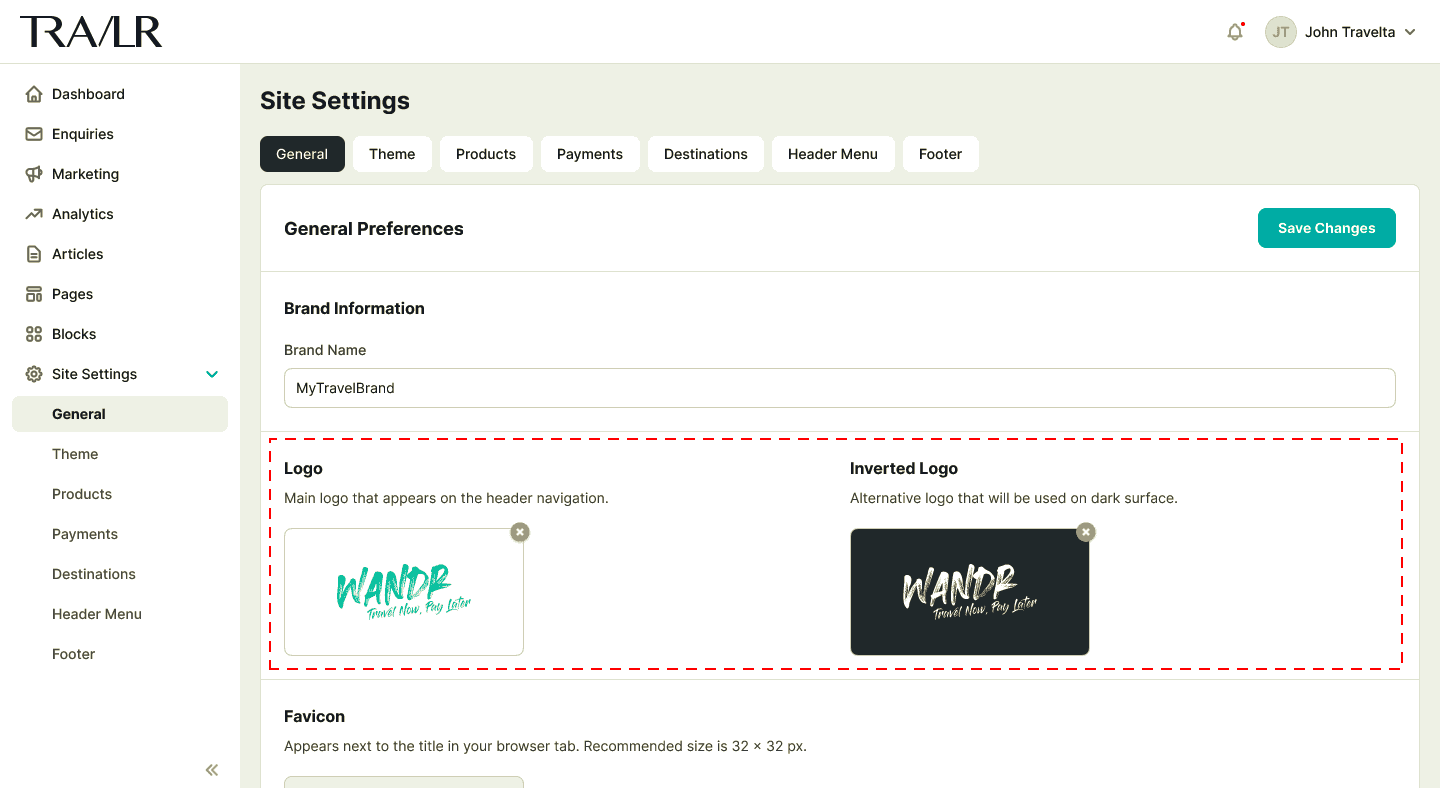
Your logos will be displayed on the homepage (on the header and the footer), checkout page, payment process page, and articles.
Important Tips:
As a visual representation of your brand, your logo should be clear, simple, and relevant. It needs to be able to immediately attract the attention of your intended online customers.
Choose or create a logo with color combinations that complement the colors of your site – to make it stand out.
If your logo contains typography, make sure that it’s easy to read. If you wish to add your tagline to the logo, consider the best size and colors for it.
Steps:
From your TRAVLR Dashboard, go to Site Settings
Click General tab
In the General Preferences section, go to the Logo subsection
To upload your main logo (appears on the header navigation) and inverted logo (appears on any dark background), click Upload or drop your image into the box. Then, click Save Changes
Set up your favicon
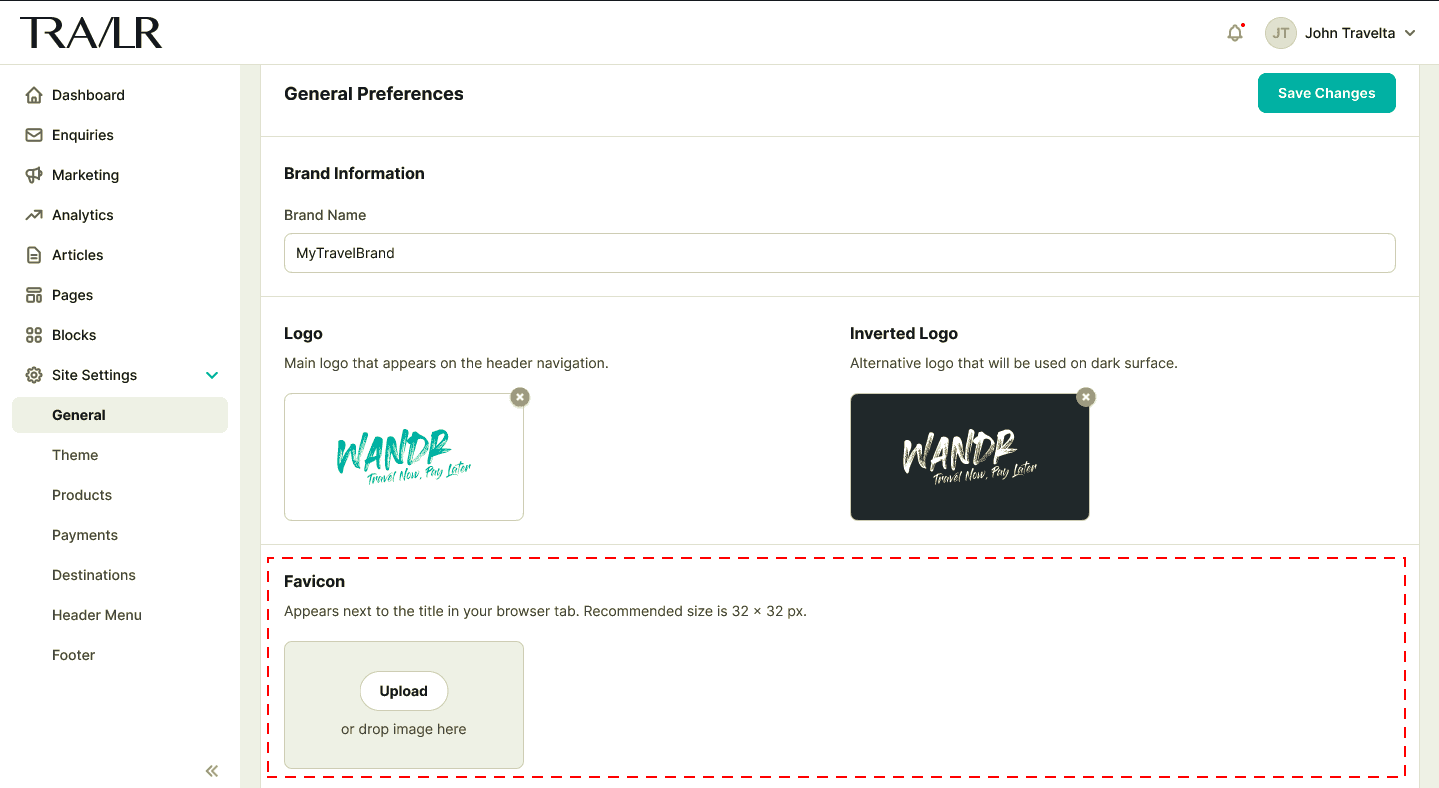
Favicon will appear as an icon next to the site’s title on your internet browser tab. It will also appear in address bars, bookmark lists, search engine results pages (SERPs), toolbars, browser history, and other places across the web.
Important Tips:
Why is your favicon important? Favicons help boost your site’s visibility in your customers’ browsers as an extension of your brand’s identity. It will also make your site look more professional.
Your favicon should match the elements of your logo, although it doesn’t have to be a carbon copy. A simple icon that is simpler than your logo but is still relevant would be more preferable.
Steps:
From your TRAVLR Dashboard, go to Site Settings
Click General tab
In the General Preferences section, go to the Favicon subsection
To upload your favicon (recommended size is 32x32 px), click Upload or drag your image into the box and click Save Changes
Set up your metadata
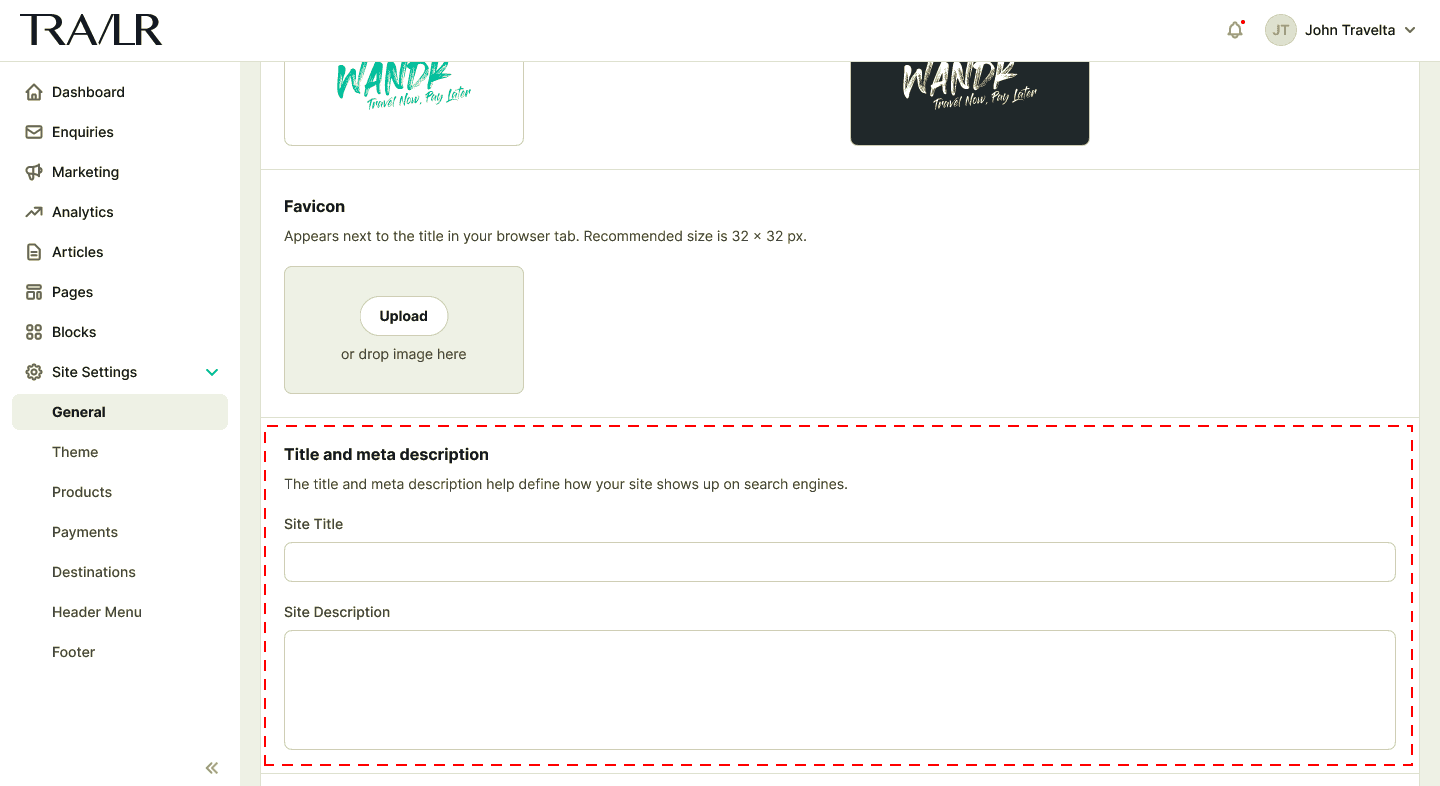
Metadata consists of a meta title and a meta description. It contains descriptive bits of information hidden in the codes. While these elements aren’t shown on the surface of your website, they will define how your site shows up on search engines.
Metadata provides search engines with the most crucial information about your website, including titles and descriptions. When someone searches for your online travel e-commerce platform on a search engine, your metadata is what tells the search engine you have the relevant information.
Steps:
From your TRAVLR Dashboard, go to Site Settings
Click General tab
In the General Preferences section, go to the Title and meta description subsection
Enter the meta title under Site Title and the meta description under Site Description. After that, click Save Changes.
Important Tips:
Use a meta title that are accurate representations of your online travel e-commerce platform and add a meta description that you’d want a search engine to know you have on your site.
The ideal length for a meta title is between 50 and 60 characters. Meanwhile, a meta description is between 50 and 160 characters.
Set up social sharing elements
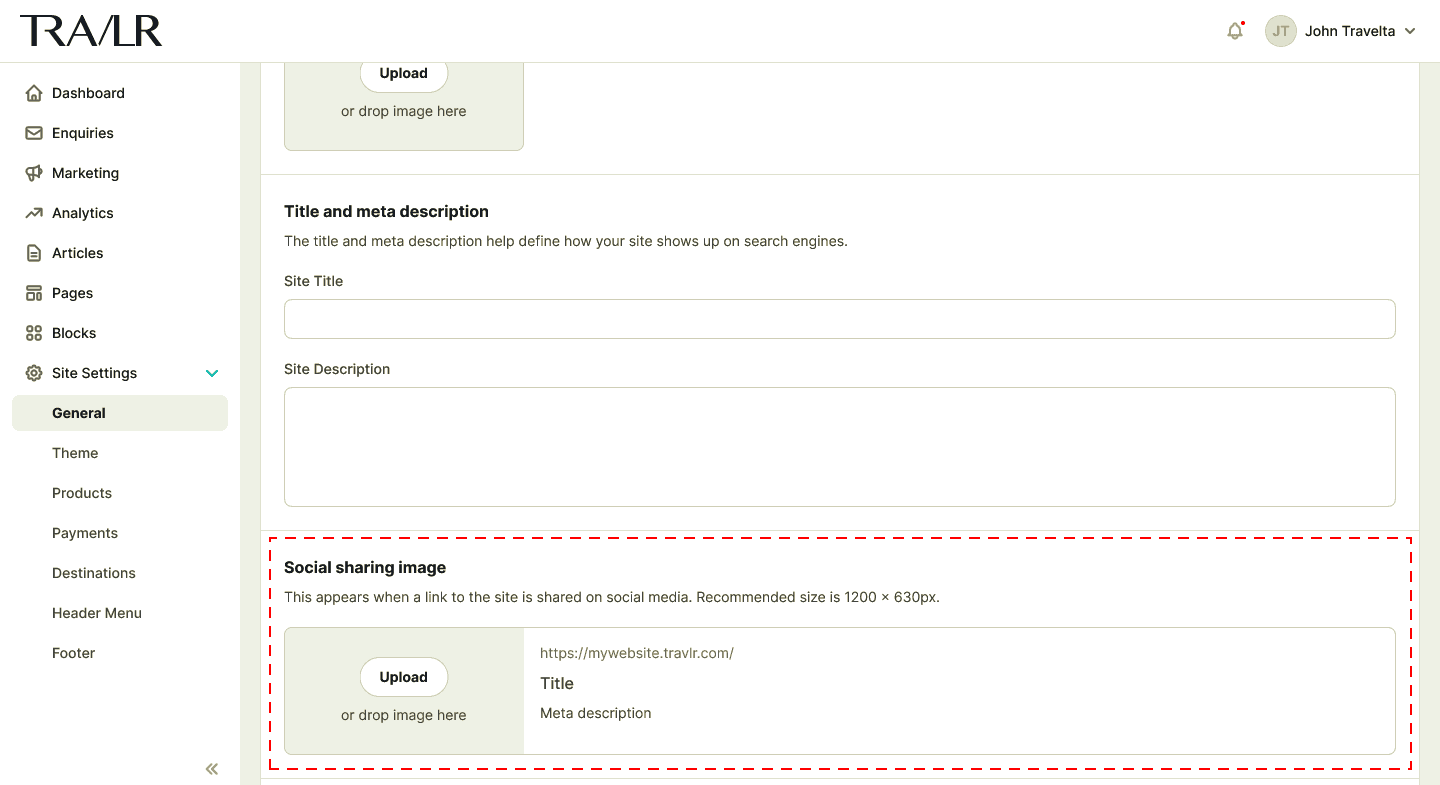
These elements will appear when a link to your site is shared on social media. The title and description will mirror the ones in your meta elements. You can customize the image in this section.
Steps:
From your TRAVLR Dashboard, go to Site Settings
Click General tab
In the General Preferences section, go to the Social Sharing subsection
To upload your Social Sharing image (recommended size is 1200x630 px), click Upload or drag your image into the box and click Save Changes.
Set up third-party analytics integrations
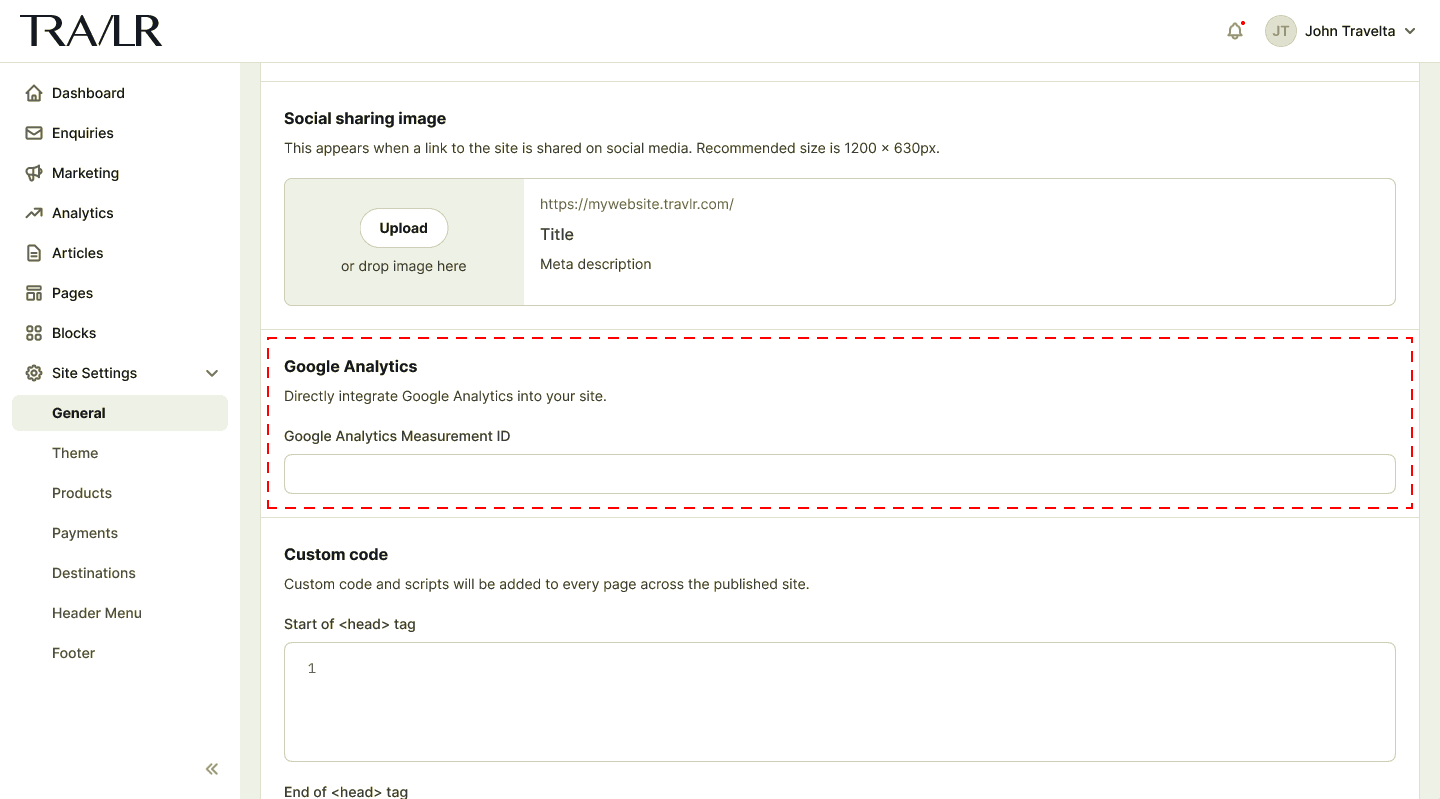
TRAVLR allows your platform to integrate with third-party analytics and pixels. Specifically, we provide an easy integration with Google Analytics. For other integrations, we also allow you to add custom codes.
Follow these steps to directly integrate Google Analytics with your site.
Steps:
From your TRAVLR Dashboard, go to Site Settings
Click General tab
In the General Preferences section, go to Google Analytics subsection
Enter your Google Analytics Measurement ID and click Save Changes
Follow these steps to add custom codes and scripts to specific parts of your site.
Steps:
From your TRAVLR Dashboard, go to Site Settings
Click General tab
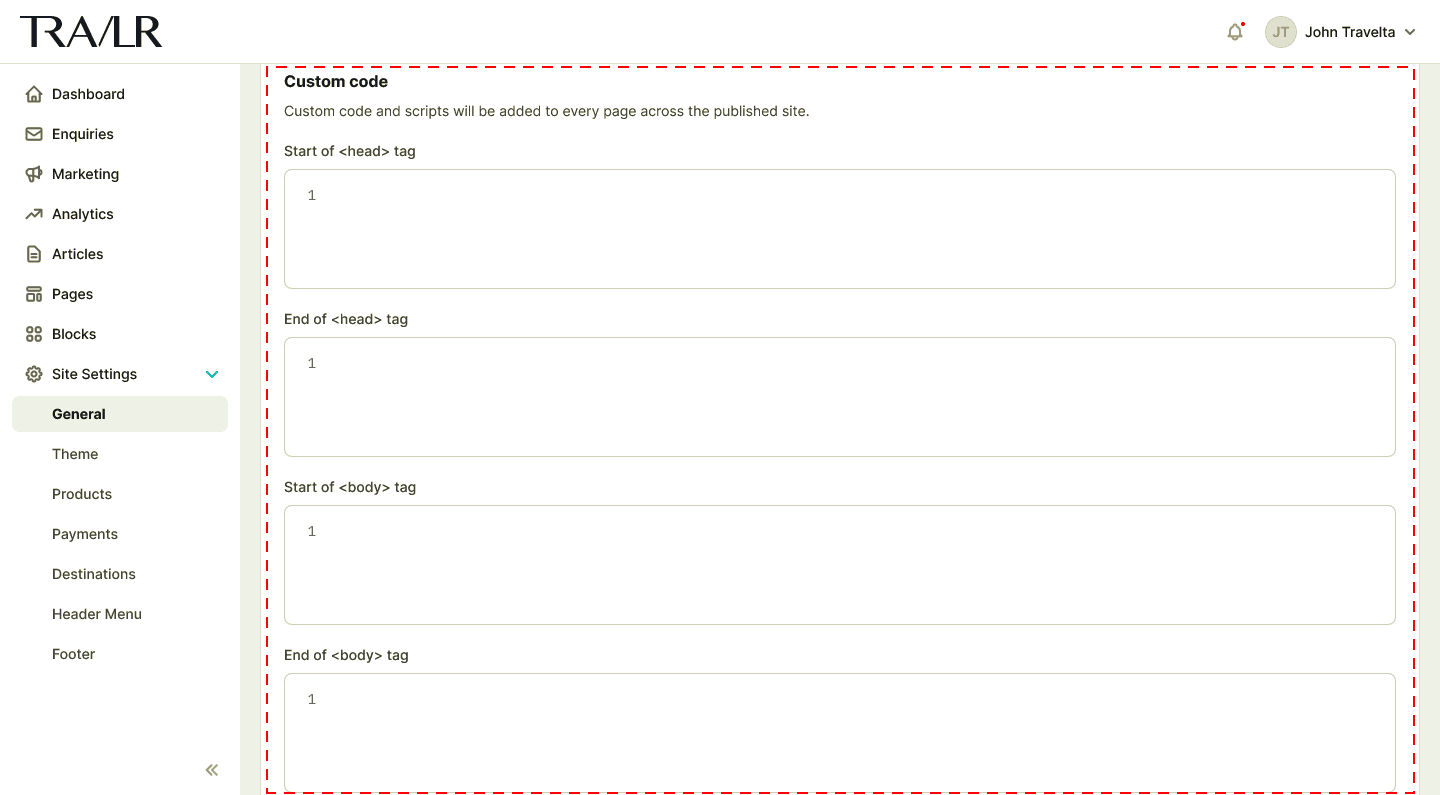
In the General Preferences section, go to Custom Code subsection
Enter the custom codes or scripts in one (or more) of the available fields depending on your needs. There are four available fields: start of <head> tag, end of <head> tag, start of <body> tag, and end of <body> tag. Click Save Changes when done.
